 Today we had the settlement on our new house. Since there wasn’t a mortgage, it was not a complicated thing. We didn’t pay a lot of money for the new place – it could be considered a fixer-upper. Going into the deal, we were aware of the following problems.
It has no kitchen. None. No cabinets, no sink. The only thing in the kitchen is an electric range, but I wouldn’t want to use it. The kitchen has a ceramic tile floor that has to go, too.
The basement gets wet. We’ve already fixed that problem by replacing the gutters. The old ones were leaking badly and the downspouts didn’t have elbows or splash blocks (so they just concentrated and injected the water at one place – the foundation corners). As of the last rain, the problem seems to be solved. Cost, around $220, including a new 8′ fiberglass ladder.
Speaking of the basement, someone carted away the heater and air conditioner. Oh, and someone also took much of the copper pipe. How much crack does ten feet of copper pipe buy, anyway? So we know there’s some HVAC work to be done. Most of the duct system is still in place – it looks like it’s repairable. I have a new heater and A/C unit on the way, along with a tankless water heater and associated bits and pieces. The stuff left New York today – we should get it this week.
We have hardwood floors that I want to have refinished – that work is already in our budget. I’m meeting someone there tomorrow for an estimate to refinish all of the floors in the house. Hardwood floors look so nice when they’re freshened up.
Day One.
We learn that our fake brick is held onto the plaster walls with the strongest glue ever used.
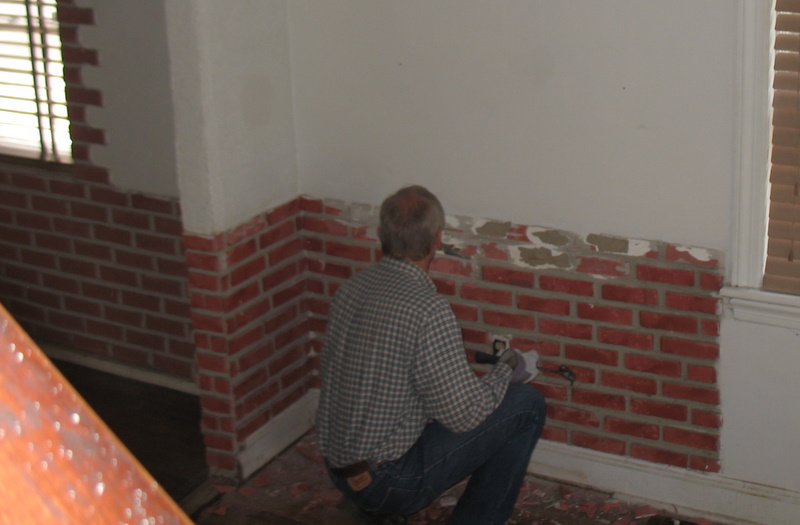
Hey, fake brick is just SO seventies. We want to get rid of it. No problem, I have a brick chisel and a couple of crowbars – should take a couple of hours, tops. Nope. In the living room and kitchen, each fake brick shatters, as if the bond holding it to the wall is stronger than the forces holding the fake brick together. Monica has pretty good luck in the dining room, where the bricks fall off the wall in one piece, anyway. There’s a lot of adhesive left on the dining room wall, but it’s nothing like the little bit of living room, where I decided to get started. I ended up taking the plaster wall (a thin coat on top of backer board) right out to the studs, as it had gaping holes in it from my brick removal efforts.
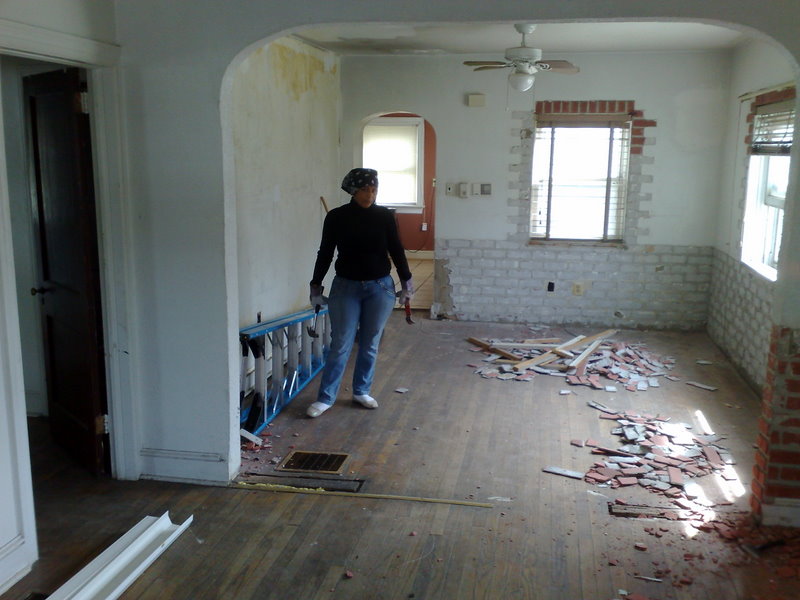
We still have lots of mortar-like stuff to remove from the dining room walls, but the bricks came off in one piece. Lots of work to do on this still….
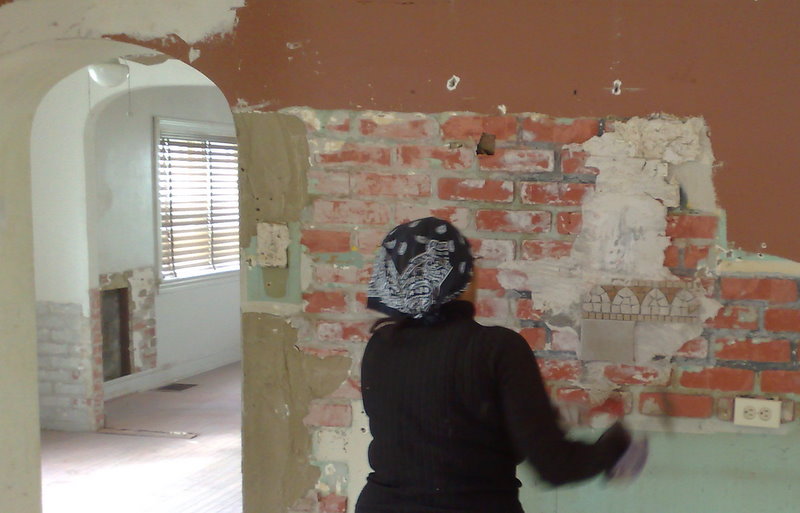
We took the tile off of the kitchen wall and found more fake brick, attached with the same adhesive-from-hell that was used in the living room. Someone had just put a whole bunch of mastic over the brick and stuck tiles on them. If you look carefully at the kitchen wall, you can see a few holes already from well-attached bricks. You can also see the living room wall (or lack of same) where I was working on the brick earlier.
I’ve got something to sleep on here. If I just pull down the walls (skim coat plaster on top of plaster board – easy), I can install modern wiring and add insulation before putting drywall back up. Of course, that’s loads of work, but not really that expensive. It would add to the value of the house, too. Boy, would it make a mess, though…. It’s what we decided to do anyway.
After beating on the walls for what seemed like hours, Monica went home to start dinner and I went off to Lowe’s to pick up some plumbing stuff. We’re going to need a bathroom and a place to wash up a bit. A preliminary survey showed that I could replace the missing copper pipe without too much work. I decided to use CPVC because there’s very little chance that anyone’s going to steal my new plastic pipes and also because it’s silly simple to work with. While I was at Lowe’s looking for an adapter to connect the plastic pipe to the existing copper, I discovered Gator Grip fittings.
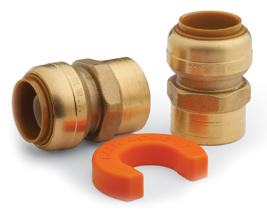
Oh my gosh…. These push on to either copper or CPVC (making them great adapters) and that’s it. No glue, no solder and they’re just a buck more than a compression adapter. Oh, and they’re removable, if you have the little plastic tool they sell for about a dollar….
You cut the end of the pipe and you push them on.
That’s all you do.
I used three of them, attaching one end to the old copper pipe and the other to the new plastic stuff. I glued the new pipe together from the meter to the couplings, putting a valve in where I decided to stop. I used a CPVC cap on the line towards the kitchen, because it’ll be a while before I need to have water there. I also put the water meter back in. I didn’t turn the water on, as I wanted to let the glue harden up nicely overnight. Also, it was getting late, and I didn’t want to have to chase down any leaks. Time for the plumbing work? About an hour. Cost? $50, including three Gator Grip fittings.
Tomorrow, the power gets turned on and I have an early morning appointment with the floor guy. We’re adding additional pages on each room as we go – see the links on the left.
Greg
Leave a Reply